

When it comes to maintaining the safety and performance of your vehicle, few systems are as important as the braking system. One critical component of your car’s braking system is the brake booster. A malfunctioning brake booster can cause various issues, including a loss of braking power, difficulty pressing the brake pedal, or, in the worst case, complete brake failure. If you’re experiencing any of these symptoms, it may be time to repair or replace your brake booster.
The good news is that with the right tools and a bit of know-how, brake booster repair can be a manageable DIY project. This comprehensive guide will take you through the process of fixing your brake booster, using a Brake Booster Repair Kit, and ensuring that your vehicle’s braking system is working as it should. Whether you’re working on a Buick or an Oldsmobile, or any other vehicle, this guide will give you the essential steps to get the job done.
Before diving into the repair process, it’s important to understand what a brake booster is and how it works. The brake booster is a crucial part of your vehicle’s brake system that helps multiply the force applied to the brake pedal, making it easier to stop the car. The booster uses vacuum pressure from the engine to assist in pushing the brake master cylinder, which then activates the brake pads to stop the wheels.
When the brake booster fails, it can make it much harder to press the brake pedal, requiring much more force to slow or stop the vehicle. This can lead to increased wear on the rest of your braking components and pose a significant safety risk if not addressed.
Knowing the signs of a failing brake booster is essential for addressing the problem before it worsens. Here are some common symptoms to watch out for:
If you notice any of these symptoms, it’s essential to diagnose and repair the brake booster to avoid further damage to your brake system and to maintain optimal driving safety.
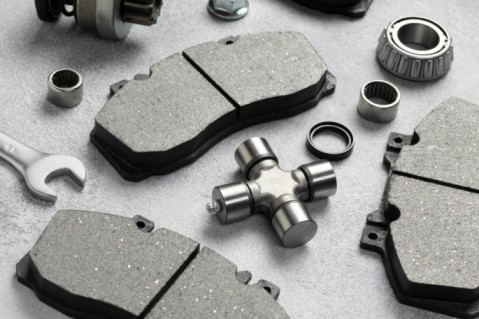
When your brake booster begins to fail, it may be tempting to replace the entire unit. However, using a Brake Booster Repair Kit can be a more cost-effective and straightforward solution. These repair kits typically include all the necessary parts to fix the internal components of the brake booster, such as seals, diaphragms, and valves.
Repairing the brake booster with a kit is often much cheaper than replacing the entire assembly, and it’s a great DIY project for those with a little mechanical knowledge. Additionally, repairing your brake booster helps preserve the integrity of your braking system, ensuring that all components are functioning correctly.
Before starting the repair, gather the following tools and materials:
Now that you’ve gathered your tools and materials, let’s dive into the step-by-step guide to repairing your brake booster.
Before starting any repair work, make sure your vehicle is parked on a level surface, with the engine turned off. For extra safety, disconnect the negative battery terminal to avoid any electrical accidents. You may also want to jack up the car if necessary to access the brake booster more easily.
In most vehicles, the brake booster is located near the brake master cylinder, on the driver’s side of the engine bay. In some cases, you may need to remove the air filter or other components to get better access. The brake booster is usually a large, round component with a vacuum hose attached to it.
Carefully disconnect the vacuum line connected to the brake booster. This line provides the vacuum pressure that powers the booster, so it’s essential to handle it with care. Depending on your vehicle, you may also need to remove the brake master cylinder to fully access the booster.
Using a socket wrench, remove the bolts securing the brake booster to the vehicle. Depending on your car, this may require removing additional components, such as the booster bracket. Carefully pull the brake booster from its mounting position.
Once the brake booster is removed, carefully disassemble it by removing the retaining clips and other fasteners. Inside the booster, you’ll find a diaphragm, seals, and valves that can wear out over time. Using your Brake Booster Repair Kit, replace the worn-out components with the new parts from the kit.
Before reassembling the brake booster, clean all components thoroughly. Dirt, dust, and debris can cause the new parts to malfunction, so make sure everything is free of contaminants.
Reassemble the brake booster by following the instructions provided in the repair kit. Ensure that all seals are properly positioned and that all clips and fasteners are tightened securely.
Once the brake booster is reassembled, carefully reinstall it in its original position. Secure it with the bolts and reconnect the vacuum line. If necessary, reinstall the brake master cylinder and other components you removed earlier.
Before taking your vehicle for a test drive, check the brake fluid levels and top them up if needed. Then, reconnect the battery and start the engine. Test the brake booster’s functionality by pressing the brake pedal. The pedal should feel smooth and responsive, with the expected amount of assistance from the brake booster.
Finally, use a vacuum gauge to test the brake booster’s vacuum pressure. If the gauge indicates that the vacuum pressure is within the correct range, you’ve successfully repaired your brake booster.
If you drive a Buick or Oldsmobile, it’s essential to ensure that the Brake Booster Repair Kit you’re using is compatible with your vehicle. While the process outlined above applies to most vehicles, Buick and Oldsmobile models may have specific requirements, such as the type of vacuum system or the design of the brake booster.
When shopping for auto parts online, especially for Buick or Oldsmobile models, consider purchasing from a reputable dealer such as Bop Parts – Oldsmobile Auto Parts Dealer Online. Bop Parts offers a wide range of quality auto parts, including brake booster kits and other essential components for your Buick or Oldsmobile. By using quality parts, you ensure that your repair lasts longer and that your vehicle operates safely.
When looking for high-quality Buick Auto Parts, Bop Parts stands out as a trusted supplier. Offering an extensive catalog of parts, including brake boosters, seals, and other brake components, Bop Parts ensures that you get the best value and reliability. Whether you are repairing or upgrading your Buick, their online platform makes it easy to find and order the parts you need.
Repairing your brake booster with a Brake Booster Repair Kit can save you money and keep your vehicle in top condition. By following this step-by-step guide, you can perform the repair yourself and enjoy the satisfaction of maintaining your vehicle’s safety systems. Whether you drive a Buick, an Oldsmobile, or any other car, ensuring your brake booster is in good working order is essential for a safe and reliable driving experience.
Remember, using quality parts from trusted suppliers like Bop Parts – Oldsmobile Auto Parts Dealer Online will help ensure your repairs are effective and long-lasting. Keep your car’s braking system in top shape by regularly checking and maintaining the brake booster to avoid costly repairs down the road.

© 2025 Crivva - Hosted by Airy Hosting Managed Website Hosting.