

That moment of excitement—you have a new design ready, you load it onto your USB stick, and you plug it into your Janome embroidery machine. Then, you see it: an error message. The file format is not supported. Your excitement quickly turns to frustration. If this scenario sounds familiar, you are not alone. This common hurdle stops many embroiderers in their tracks, but the solution is straightforward. The key to compatibility with your Janome lies in using the correct file format, which is JEF. Learning how to convert image to JEF file is the ultimate fix for these annoying error messages. This guide will walk you through the entire process, from understanding why the error occurs to the simple steps for creating a perfect JEF file every time.
Before we fix the problem, let’s understand it. Your Janome embroidery machine is not a computer; it’s a specialized piece of hardware that reads a very specific language. While your computer can open JPG, PNG, SVG, and many other file types, your Janome machine is designed to understand only embroidery-specific formats, with JEF (Janome Embroidery Format) being its native tongue.
Think of it like a DVD player. You can’t put a Blu-ray disc into a DVD player and expect it to work, even though both are discs with video content. Similarly, you can’t put a JPG image or even a Brother’s PES file into a Janome machine and expect it to stitch. The machine simply doesn’t have the software to interpret those “foreign languages.” It expects a JEF file, which contains the precise needle directions, stitch types, and color changes it needs to operate. When you try to load anything else, the result is an error message.
Here is the most important concept to grasp: you cannot directly “convert” an image like a JPG or PNG into a JEF file by simply changing the file extension. If you rename “mylogo.jpg” to “mylogo.jef,” you will still get an error. This is because you are only changing the label, not the contents of the file.
A JPG is a raster image—a grid of pixels that creates a picture. A JEF file is a set of instructions written in code for an embroidery machine. Turning a picture into instructions requires a process called digitizing.
Digitizing is the act of manually translating the shapes and colors of your image into a structured sequence of stitch commands. It involves:
Tracing the outlines of your design.
Deciding which areas will be satin stitch, fill stitch, or run stitch.
Setting the stitch direction and density.
Adding commands for the machine to trim and jump.
Understanding this distinction is the first step to eliminating error messages for good.
Now that you know you need to digitize your image, let’s explore the three main paths you can take to get a usable JEF file. The best choice for you will depend on your budget, technical comfort, and how often you plan to do this.
Method 1: The Professional-Grade Path — Digitizing Software
This method gives you the most control and is ideal for those who want to digitize their own designs regularly.
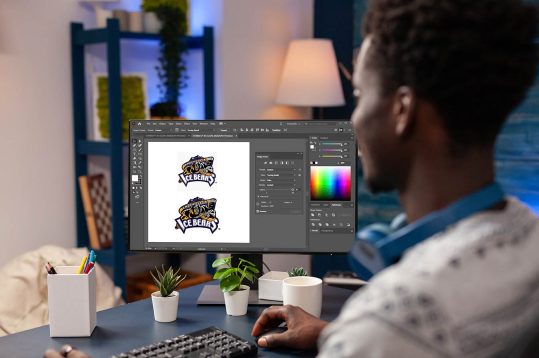
How It Works: You use professional software like Janome’s Digitizer MBX, Hatch Embroidery, or Wilcom. You import your image and use the software’s tools to manually trace the design, assign stitch types, and create the stitch sequence. You then save or export the final file in JEF format.
Pros: Highest quality results and complete creative control.
Cons: Software is expensive, and learning to digitize well takes significant time and practice.
Method 2: The Hassle-Free Path — Online Digitizing Services
For most people, especially those who just need a few logos or designs converted, this is the easiest and most reliable method.
How It Works: You upload your image file to a professional digitizing service online. You specify JEF as your desired format and provide any details (like size or fabric). A human digitizer then creates the JEF file for you and sends it back, usually within 24 hours.
Pros: You get a professional-quality JEF file without any software costs or a learning curve. It is fast, easy, and accurate.
Cons: There is a fee per design, typically based on its complexity.
Method 3: The “Quick Fix” Path — Finding Pre-Made JEF Files
Sometimes, you don’t need to convert a custom image at all. You just need a design that works.
How It Works: Instead of starting with an image, you browse online embroidery design libraries like Embroidery Library, Urban Threads, or Etsy. You can search for and purchase designs that are already saved in the JEF format and ready for your Janome.
Pros: Instant, guaranteed compatibility. No conversion or digitizing needed.
Cons: You are limited to the designs available for purchase, not your own custom artwork.
Follow these steps to ensure you never face an error message again.
Choose Your Source Image Wisely: Start with a clear, high-contrast image. Simple logos with bold lines work much better than detailed photographs.
Select Your Conversion Method: Decide whether you’ll use software, an online service, or buy a pre-made file. For custom work, the online service path is highly recommended for beginners.
Execute and Receive Your JEF File: If using a service, upload your image and wait for the file to arrive. If using software, complete the digitizing process and export as JEF.
The Non-Negotiable Test Stitch: Before you stitch on your final project, always do a test run. Hoop a scrap piece of the same fabric you plan to use. Stitch out the design and check for any issues like puckering, thread breaks, or misaligned elements.
Stitch with Confidence: Once your test stitch looks perfect, you can load the JEF file onto your USB and stitch your final project with the confidence that your Janome will recognize it and run smoothly.
Even with a JEF file, you might occasionally run into problems. Here’s what to check:
Corrupted USB Drive: Try formatting your USB stick (after backing up your files) and reloading the JEF file.
File Name Issues: Janome machines can be sensitive to long or complex file names. Try renaming your JEF file to something short and simple, using only letters and numbers (e.g., “Design1.jef”).
Firmware Update: Check if your Janome machine has a firmware update available. Sometimes updates improve file compatibility.
Error messages on your Janome embroidery machine are a solvable problem. The solution is not a complicated technical fix but a fundamental understanding of file formats. By learning that you must convert image to JEF file through the process of digitizing, you unlock seamless compatibility with your machine. Whether you choose the control of professional software, the ease of an online service, or the simplicity of pre-made designs, you now have a clear path forward. Ditch the frustration and wasted time. Embrace the right tools and knowledge, and transform your creative ideas into beautiful, error-free embroidery.
© 2025 Crivva - Hosted by Airy Hosting Managed Website Hosting.


 4")


