

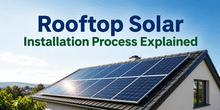
Rooftop solar energy is one of the best ways to reduce electricity bills and use clean energy at home. Many homeowners and businesses are now installing solar panels on rooftops because it is a long-term investment and helps save money every month.
In this blog, we will understand the complete rooftop solar installation process in proper detail, step by step, in a very simple and easy language.
A rooftop solar system is a setup where solar panels are installed on the roof of a house, shop, or building. These panels capture sunlight and convert it into electricity.
This electricity is used to run daily appliances like:
Fans
Lights
Refrigerator
AC
Water pump
TV and more
The system helps you generate your own electricity and reduces dependence on the electricity grid.
The first and most important step is checking the rooftop properly.
A solar installer visits your home and checks:
Enough open space is required
No unnecessary objects on roof
Roof should get direct sunlight
Minimum 5–6 hours sunlight daily is ideal
Shadows from trees, water tanks, nearby buildings are checked
Shadows reduce solar power generation
Roof must be strong enough to hold solar panels
Load-bearing capacity is tested
Your monthly electricity bill is checked
This helps decide system size (kW capacity)
This step ensures whether solar is suitable for your home or not.
After inspection, the next step is deciding system size.
System size depends on electricity consumption.
100–150 units/month → 1 kW system
200–300 units/month → 2–3 kW system
400–600 units/month → 4–5 kW system
700+ units/month → 6 kW and above
Small system → less savings
Large system → unnecessary cost
So correct sizing gives maximum savings and best performance.
There are 3 types of rooftop solar systems:
Connected to electricity board (DISCOM)
No battery required
Extra power goes to grid
Cheaper installation
Best for cities
Most homes use this system
Not connected to grid
Works with battery storage
Useful in rural areas or power cut zones
Higher cost due to batteries
Combination of on-grid + battery
Works during power cuts
Expensive but flexible
After selecting system type, engineers design the system.
This includes:
Where panels will be placed on roof
Direction is usually south-facing for best sunlight
Panels are fixed at an angle
Helps capture maximum sunlight
DC wiring (panel to inverter)
AC wiring (inverter to home)
String inverter or micro inverter
Depends on system size
Earthing system
Lightning protection
Proper design increases power generation efficiency.
Before installation, approval is required from electricity company (DISCOM).
Net metering allows you to:
Use solar electricity at home
Send extra electricity to the grid
Get credit for extra power
Application submission
Document verification
Site inspection by authority
Approval letter
Electricity bill
ID proof
Property proof
Application form
This process may take few days to weeks.
After approval, all materials are arranged:
Solar panels (most important part)
Inverter (converts DC to AC)
Mounting structure (iron/aluminum frame)
DC & AC cables
Junction boxes
Earthing system
Net meter
High-quality panels give better output
Good inverter ensures system stability
Strong structure ensures safety in wind/rain
Now actual installation begins.
Metal structure is fixed on roof
It is bolted or cemented properly
Must be strong against wind and rain
Panels are placed on structure
Fixed at correct angle
Proper spacing is maintained for airflow
Panels are connected in series or parallel
DC cables carry electricity to inverter
Proper insulation is done for safety
Installed inside house or shaded area
Converts DC power into usable AC electricity
Electricity from inverter goes to main distribution board
Home appliances start using solar power
Earthing rods installed
Protects system from lightning and voltage issues
After installation, system is tested:
Panel voltage output
Inverter performance
Wiring connection safety
Earthing test
Load test
If everything works properly, system is approved for final connection.
Once approved by electricity board:
System is connected to grid
Net meter is installed
Solar system becomes active
Now your home:
Uses solar electricity in daytime
Sends extra power to grid
Reduces electricity bill
Most modern systems have mobile apps.
You can track:
Daily electricity generation
Monthly savings
System health status
This helps you understand performance anytime.
Solar systems need very low maintenance.
Clean panels every 1–2 months
Remove dust, leaves, bird droppings
Check inverter display
Annual inspection by technician
Save up to 70–90% depending on usage
Solar panels last 20–25 years
No pollution, clean energy
Very little maintenance required
Less dependence on electricity company
Wrong system sizing
Poor roof inspection
Low-quality equipment
Ignoring shadow areas
Incorrect installation angle
Avoiding these mistakes increases system efficiency.
Rooftop solar installation is a step-by-step process that includes roof inspection, system design, approval, installation, testing, and final grid connection.
Once installed properly, it gives long-term savings and clean energy for many years.
If planned correctly, rooftop solar is one of the smartest investments for any home or business, and choosing an experienced provider like Shree Hari Solar can help maximize the performance and reliability of your solar system.

© 2025 Crivva - Hosted by Airy Hosting Managed Website Hosting.