

Have you ever sat down for a high-stakes video interview, nailed your talking points, and then cringed when you saw the playback? Maybe you looked a bit like a ghost in a dimly lit basement, or perhaps one side of your face was lost in a harsh, dramatic shadow. It’s a frustrating reality: you can have the most insightful things to say, but if you look like you’re filming from a closet, your authority takes a hit.
When you see a CEO interviewed on a major TV station, they don’t just happen to look great. Every highlight and shadow is a calculated choice. Professional lighting is the “secret sauce” that separates a casual Zoom call from a high-end TV commercial production. It tells your audience that you’re a serious professional before you even open your mouth.
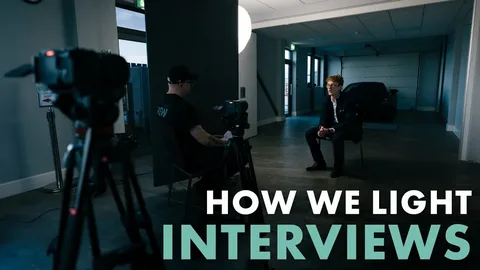
In this guide, we’re going to pull back the curtain on how the pros do it. We’ll show you how to transform any office or studio into a space that radiates confidence and trust.
There’s a common misconception in the video world: people think a $5,000 camera is the key to a “pro” look. While a nice lens helps, even the most expensive sensor will produce “noisy,” muddy footage if the lighting is poor. Conversely, a smartphone can look like a cinema camera if the lighting is perfect.
Interestingly, research into viewer behavior suggests that nearly 67% of viewers say video quality—specifically clarity and lighting—directly impacts their trust in a brand [source needed]. If your lighting is flat or unflattering, your message might literally be left in the dark.
Think about the last time you watched an expert interview. Did you notice how they seemed to “pop” off the screen? That’s not a camera trick; it’s the result of intentional, layered lighting.
If you walk onto the set of any major TV commercial production, you’ll see a variation of the “Three-Point Lighting” setup. It’s the foundational technique used to create depth, dimension, and a flattering glow on a subject’s face.
This is your primary light source. It’s the brightest light and should be placed at a 45-degree angle to your subject. It shouldn’t be directly in front of them (which makes faces look flat) but rather slightly to the side to create subtle shadows that define the jawline and cheekbones.
The Fill Light sits on the opposite side of the Key Light. Its job is to “fill in” the shadows created by the Key Light. However, you don’t want it to be as bright as the Key; if it is, you’ll lose the depth in the face. A good rule of thumb is to keep the Fill at about 50% of the Key Light’s intensity.
Also known as the “Hair Light,” this light is placed behind the subject and slightly above them. It shines on the back of the head and shoulders, creating a subtle rim of light. This is what separates the person from the background, preventing them from looking like a “floating head” in a dark room.
Not all light is created equal. Have you ever noticed how the sun at noon feels harsh, while the light through a window on a cloudy day feels soft and beautiful? That’s the difference between “Hard” and “Soft” light.
For business interviews, soft light is almost always the winner. Hard light highlights wrinkles, skin imperfections, and creates “hot spots” on the forehead. To get that soft, broadcast-ready look, you’ll want to use diffusion.
Softboxes: These are large cloth boxes that go over your LEDs to spread the light.
Umbrellas: A classic choice for reflecting light back onto the subject for a gentle glow.
Diffuser Panels: Even a white bedsheet can work in a pinch to soften a harsh bulb!
When your light is soft, it wraps around the face, making the skin look smoother and the eyes look brighter. It’s the difference between looking tired and looking energized.
Have you ever seen a video where the subject looks strangely orange or sickly blue? This is a “White Balance” issue caused by mixing color temperatures.
Lights are measured in Kelvins. A traditional “warm” household bulb is around 3200K, while natural daylight is around 5600K. If you’re filming in an office with a window (Daylight) but using old desk lamps (Warm), your camera will get confused.
To look like you’re on a professional TV station, you should match your light sources. If you have windows in the room, use “Daylight Balanced” LEDs. If you’re in a windowless basement, you can go warmer, but keep everything consistent. [Check out our guide on color grading] to see how to fix these issues in post-production.
I remember a client, a high-level consultant named Sarah, who decided to record her first series of thought-leadership videos in her home office. She had a massive window behind her. On camera, she looked like a dark silhouette—completely unrecognizable—because the camera was adjusting for the bright sky outside.
We helped her move her desk so the window was in front of her at an angle, acting as a natural Key Light. We added one small LED to fill the other side and a lamp in the background for “texture.” Suddenly, she looked like she belonged on a network news program. Are you fighting against your room’s natural light, or are you making it work for you?
Your background shouldn’t be an afterthought. If you’re sitting against a plain white wall, the video will feel “cheap.” To get a high-end look, you need Depth and Texture.
Practical Lights: Use a desk lamp or a floor lamp in the background. It adds a “pop” of color and makes the room feel lived-in.
RGB Accents: Many modern TV station sets use subtle blue or purple “washes” on the back wall to add brand personality.
Bookcases and Plants: These break up the light and add visual interest without being distracting. [How to design your studio backdrop] offers more tips on creating a professional environment.
Before you hit record, take a moment to look at your reflection.
Check for “Glasses Glare”: If you wear glasses, move your lights higher up to prevent the “white circles” from obscuring your eyes.
Watch the Forehead: Use a little translucent powder if the lights are creating a “shiny” spot.
Kill the Overhead Lights: Standard office fluorescent lights are the enemy. They create “raccoon eyes” (dark shadows under the eyes). Turn them off and rely on your dedicated kit.
Lighting isn’t about how much money you spend; it’s about how you direct the light you have. By applying the Three-Point system and focusing on soft, consistent color, you can turn a basic interview into a powerful brand asset.
When your visuals match the quality of your message, you remove the barriers between you and your audience. You aren’t just a person on a screen; you’re an authority in your field. Treat your next video like a professional TV commercial production, and watch how your engagement changes.
Ready to shine in your next interview? If you’re looking to elevate your business videos with broadcast-quality lighting and production, we’re here to help. From equipment consulting to full-service video teams, we make sure your brand is always seen in the best light. Reach out today to start planning your next professional shoot!
© 2025 Crivva - Hosted by Airy Hosting Managed Website Hosting.


