Using a self mixer for onsite concrete mixing simplifies the whole process. From loading to discharging, each step is handled efficiently.
Onsite concrete mixing offers flexibility and control for many construction projects. Using a self mixer makes this process faster and more efficient. This article explains how to use a self mixer for onsite concrete mixing, from start to finish.
The process includes loading materials, mixing, and discharging the concrete. Each step is important for achieving the best results.
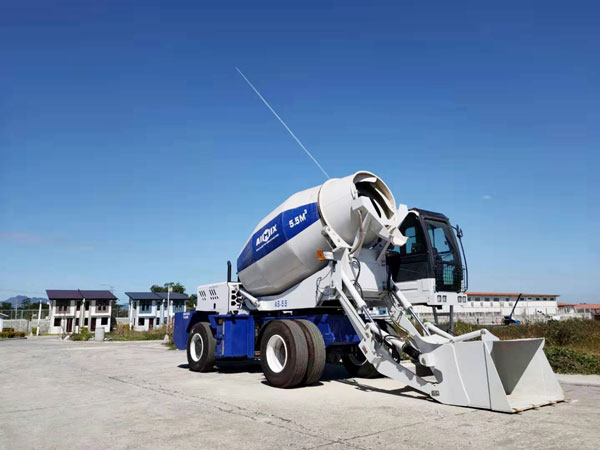
A self mixer is a machine that loads, mixes, and discharges concrete by itself. It is designed to handle the full mixing process on site. This reduces the need for extra equipment and workers.
Self mixers are ideal for small to medium construction jobs. They are easy to move and operate. That makes them useful for many different project types.
Using a self mixer improves efficiency and concrete quality. It also saves time and labor costs. These benefits make it a smart choice for onsite concrete mixing.
The first step is loading the raw materials into the self mixer. These include cement, sand, gravel, and water. The machine usually has a separate opening for each material.
Start by adding dry materials like cement, sand, and aggregates. Load them in the correct ratio for your concrete mix. This ensures the right strength and consistency.
After the dry materials are in, add the right amount of water. Too much or too little water affects the concrete quality. Always follow the recommended mix ratio for your project.
Once the materials are loaded, the self mixer starts the mixing process. The drum rotates to blend the cement, sand, gravel, and water evenly.
The mixing time depends on the type and amount of concrete needed. Most jobs require 5 to 10 minutes of mixing. This ensures a uniform and smooth mixture.
During mixing, check the consistency regularly. The concrete should be neither too dry nor too watery. Adjust water or materials if needed while mixing.
After mixing, the self mixer discharges the concrete directly at the work site. The drum tilts to pour out the ready mix where it is needed.
Make sure the discharge area is ready before starting. Place molds, frameworks, or tools where the concrete will go. This helps avoid delays and keeps the process smooth.
Discharging should be done carefully to avoid spills. Proper placement ensures better results and less cleanup. Work with your team to manage the flow efficiently.
Using a self mixer for onsite concrete mixing has many advantages. It saves time by combining all steps into one machine. That reduces the need for extra workers or equipment.
It also improves concrete quality. You control the mix ratio and mixing time. This leads to stronger and more reliable results.
Onsite mixing is also more flexible. You can adjust the mix as needed for different parts of the project. This adaptability helps meet specific construction needs.
To get the best results from onsite concrete mixing using a self mixer, proper preparation and operation are essential. Here are more useful tips to improve efficiency and ensure high-quality concrete.
Selecting the right spot for mixing is important. Place the self mixer on stable, flat ground. This prevents tipping and ensures smooth operation during the mixing process.
Make sure the location is close to where the concrete will be used. This reduces the time and effort needed for transportation after discharging. It also minimizes the risk of segregation.
Avoid mixing on muddy or uneven surfaces. These conditions can affect machine stability and concrete quality. A firm base leads to better mixing and safer operation.
Accurate measurement of materials is key to good concrete. Use proper tools to measure cement, sand, gravel, and water. This ensures the correct mix ratio for strength and durability.
Wrong measurements can weaken the concrete or cause it to crack. Follow the project specifications or standard guidelines for the type of mix you need.
Keep the materials dry and free from impurities. Wet sand or dirty aggregate can affect the mix quality. Store materials properly before use to maintain their quality.
Stay close to the self mixer during the mixing process. Watch the drum rotation and check the consistency as it mixes. This helps catch any issues early.
If the mix looks too dry, add a small amount of water. If it’s too wet, add more dry materials gradually. Do not make sudden changes to avoid inconsistent results.
Mix for the recommended time, usually between 5 to 10 minutes. Overmixing can wear out the machine and waste energy. Undermixing leads to poor concrete quality.
Regular maintenance keeps the self mixer in good working condition. Clean the drum and blades after each use to remove dried concrete. This prevents buildup and damage.
Check the belts, bearings, and seals for wear and tear. Replace damaged parts immediately to avoid breakdowns during work. Well-maintained machines perform better and last longer.
Store the self mixer in a dry place when not in use. Cover it to protect from dust and rain. Proper storage protects the machine and ensures it’s ready for the next job.
Safety is important when operating a self mixer. Wear gloves, goggles, and boots to protect yourself from dust and splashes. Never insert hands or tools into the drum while it’s rotating.
Train all workers on how to use the machine safely. Follow the manufacturer’s instructions for loading, operating, and discharging. Safe practices prevent accidents and injuries.
Keep the work area clean and organized. Remove spilled materials and clear the path for easy movement. A tidy site improves efficiency and reduces risks.
Using a self mixer for onsite concrete mixing is a practical and efficient method. From loading to discharging, each step contributes to the quality and speed of your work.
By following the right procedures and maintenance tips, you ensure better results and longer machine life. A self mixer gives you control, flexibility, and convenience right at your job site.