Learn how to replace a dryer vent cover in Citrus Heights with simple steps, tools, safety tips, and cost breakdowns. DIY-friendly and efficient.
If your dryer vent cover is broken, missing, or just plain old, replacing it isn’t as scary as it might sound. In fact, it’s one of those homeowner tasks that looks harder than it actually is. Whether you’re dealing with birds nesting in your vent or air leaking into your laundry room, learning how to replace a dryer vent cover can make your home safer and more energy-efficient Dryer Vent Cover Replacement.
Let’s be honest—most of us don’t even notice our dryer vent cover until something goes wrong. But this little piece of hardware plays a big role. It keeps out rain, pests, and cold air, while letting hot air escape when your dryer is running. A damaged or missing cover can cause all sorts of problems—think mold, high energy bills, or lint buildup, which is a fire hazard.
Before you start, gather a few basic tools. You don’t need anything fancy. Here’s a quick table to help:
| Tool/Material | Purpose |
|---|---|
| Screwdriver (usually Phillips) | To remove and install screws |
| New dryer vent cover | The star of the show |
| Caulk or weatherproof sealant | To create a tight, weatherproof seal |
| Gloves and safety glasses | Optional, but good for protection |
| Drill (optional) | For stubborn old screws |
“Taking care of the small things—like your dryer vent cover—can make a big difference in your home’s comfort and safety.”
Let’s break it down into beginner-friendly steps. Don’t worry if you’re not super handy—this is totally doable in under an hour.
First, go outside and find your dryer vent. It’s usually low to the ground, near your laundry room. Use your screwdriver to remove the screws holding the old cover in place. If it’s sealed with caulk, gently slice through it with a utility knife.
Pro tip: Wear gloves! Sometimes bugs or lint clumps are hiding in there.
Before installing the new one, clean the vent opening. Pull out any built-up lint, debris, or spider webs. This helps prevent blockages and ensures a better seal.
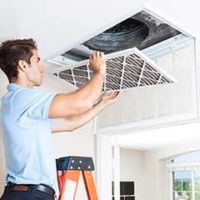
This is also the perfect moment to check inside the duct—if you see a lot of lint, it might be time for a full dryer vent cleaning.
Replacing a dryer vent cover is low-risk, but here’s what you should keep in mind:
| Key Feature | Safety Tips | Cost Estimates |
|---|---|---|
| Vent Accessibility | Use a stable step stool if it’s high off the ground | Free if within reach |
| Debris Removal | Gloves protect against sharp lint or bugs | Free (just your time) |
| New Vent Cover | Choose a cover with a pest guard if possible | $10–$25 depending on material |
| Caulking the Seal | Use outdoor-safe caulk for long-term durability | $5–$8 per tube |
| Time Investment | Allocate about 30–60 minutes for the full job | DIY = $0 labor cost |
Q1: How often should I replace my dryer vent cover?
Every 5–10 years, or sooner if it’s cracked, missing, or not opening properly.
Q2: Can I just cover the vent with mesh or screen to keep bugs out?
Technically, yes—but it’s not recommended. Lint can get trapped in screens, creating a fire hazard. Use a proper vent cover with a built-in pest guard.
Q3: What happens if I don’t replace a broken vent cover?
You’re inviting in cold air, moisture, and pests—not to mention risking fire due to lint buildup. It’s not worth skipping!
Replacing a dryer vent cover might not be the most glamorous weekend project, but it’s one of those small wins that pays off in a big way. You get better airflow, better efficiency, fewer pests, and a more weather-proof home. For Citrus Heights homeowners, especially during weather swings, this is a must-do task that’s totally manageable with basic tools and a little time.